.svg)

You want a site that is both professional and efficient that optimizes your conversionss?
You don't know how to do it because the majority of your leads leave your site before they have even read a single line ?
Follow this step-by-step guide to optimize load speed, improve user engagement, and boost your SEO.
We will see how to get the most out of Webflow (reproducible on other technologies) through simple but effective optimization techniques.
Ready to give your site a boost?
Let's go!
Why is speed crucial?
Before we get started, let's recall some key figures that prove the crucial importance of performance:
- 🐌 1 second of delay in loading a page causes 11% loss of page views and up to 7% drop in conversions
- 🏃 53% of visitors on mobile leave a site that takes more than 3 seconds to load
- 🥇 The loading speed is the first criterion used by Google to rank mobile sites since July 2018
So many good reasons to pamper the performance of your Webflow!
Here's how to do it, step by step.
Step-by-Step Detailed Guide to Optimizing Speed
1. Optimizing Third-Party Scripts
Les 3rd party scripts are often the first Responsible for slow sites : Analytics, chats, Facebook Pixel, Facebook Pixel, Email Marketing, advertising... they are necessary but weigh a lot.
Here's how to make sure they're still pros and not cons:
1.1 Keep only essential scripts
- Sort through all your scripts and remove the ones that are no longer useful
- Ensure that each script is only added to the pages where it is used.
- In the global footer, leave only the scripts present on each page (analytics, fonts...).

Keep only essential scripts and only where they are needed
1.2 Move scripts forward</body>
Place your beacons <script> just before closing </body>. This will allow your content to be displayed before loading the scripts.

1.3 Use “async” or “defer” attributes
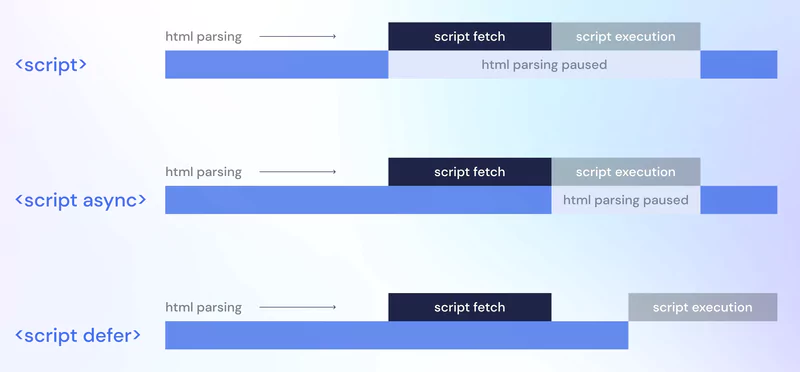
async: the script will be loaded in parallel and executed as soon as possible (the DOM may not be ready). Great for standalone scripts like analytics.
<script async src="script.js"></script>
Defer: the script will also be loaded in the background but executed only when the page is ready. Perfect for scripts that interact with the DOM.
<script defer src="script.js"></script>
Test both options and keep the one that gives the best result in your case.
1.4 Integrate code directly for small scripts
If you only need a small piece of code, embed it directly into your page instead of loading it from an external URL. But be careful not to abuse, otherwise your code will become unreadable.
1.5 Delay loading with setTimeout
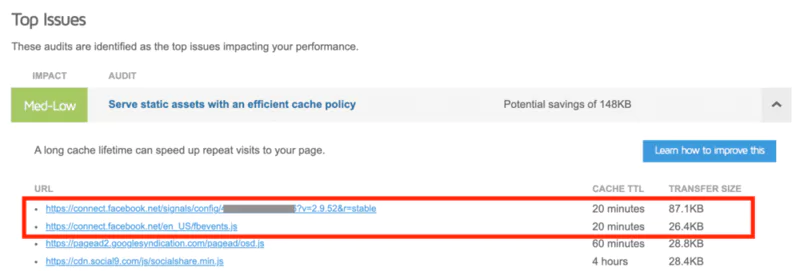
For non-critical scripts (Facebook Pixel, Intercom, Hotjar...) ), Delay their loading for a few seconds via a setTimeout :
<script>
$ (document) .ready (function () {
  function waitForEverything () {
//Ex: Facebook Pixel code
  }
  setTimeout (waitForEverything, 5000);
});
</script>
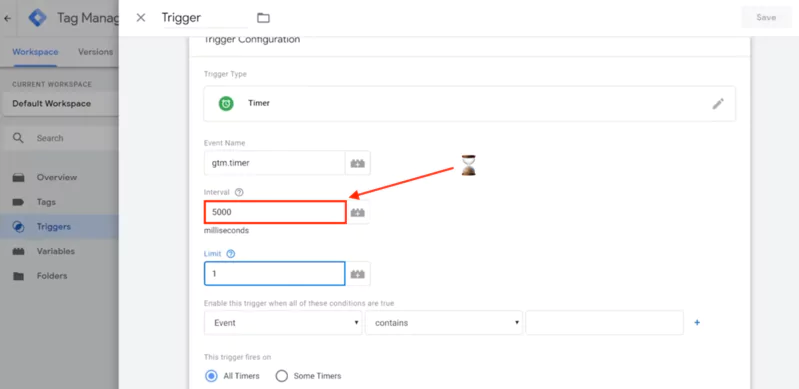
A delay of a few seconds will not annoy your visitors but will ease the initial load, especially for the Facebook pixel. (see the detailed implementation guide)
This is also possible via Google Tag Manager using a timer:
1.6 Load scripts conditionally
If some scripts are only useful in certain cases (advertising scripts if the user comes from a campaign...), load them only if these conditions are met.
1.7 Use “preconnect” for key origins
Add tags Preconnect to your most important origins (Webflow, Google Fonts, key libraries...) to establish an early connection:
<link rel="preconnect" href="https://fonts.gstatic.com">
Preconnect makes it possible to advance the TCP connection phase at critical origins
But use them sparingly because they require resources: maximum 2 to 3
2. Optimize Fonts
2.1 Limit the number of fonts
Just 1 or 2 fonts per page (more can be done but use fast fonts and only what you need)
System fonts (Arial, Helvetica...) are efficient but do not hesitate to look for beautiful “light” fonts.
Here are mine:
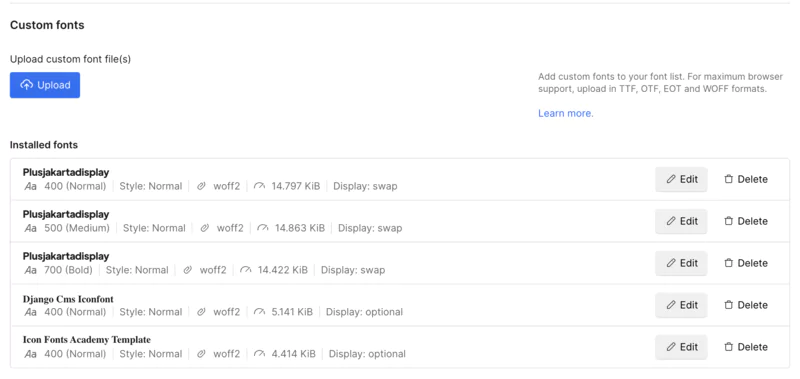
Be aware that each additional font pack adds an average of 400KB to the load of your page - be careful to load only the font sizes you need (100, 200,..., 700) and prioritize the format Woff2.
2.2 Upload your fonts manually with “swap”
Never use the default Google or Adobe fonts in the Webflow interface. Elles are very poorly loaded.
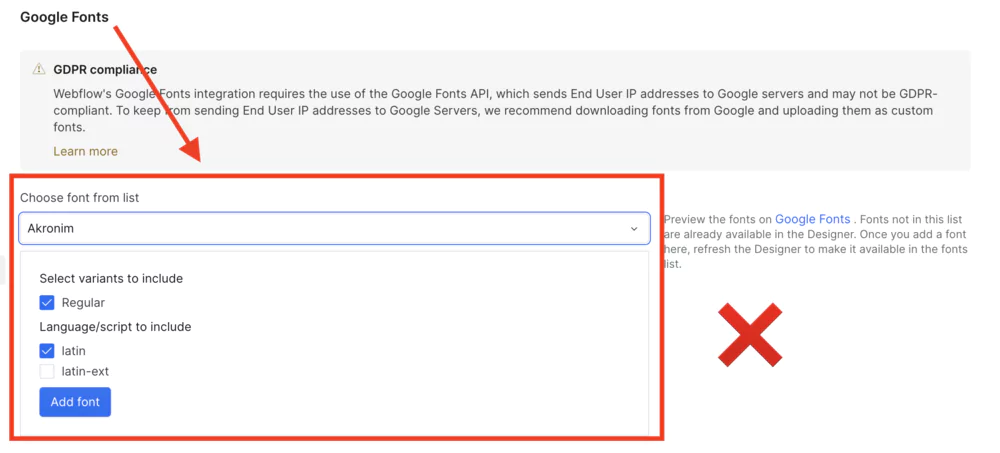
Upload all your fonts manually in the Webflow options with the” settingSwap“(the most efficient).
2.3 Preload your fonts with code
For an additional gain, preload your fonts by adding this code to your <head> :
<link rel="preconnect" href="https://fonts.gstatic.com" crossorigin/>
<link rel="preload" as="style" href="https://fonts.googleapis.com/css2?family=Merriweather&display=swap"/>
<link rel="stylesheet" media="print" onload="this.media='all'" href="https://fonts.googleapis.com/css2?family=Merriweather&display=swap"/>
3. Optimize your images
3.1 Compress all your images in WebP format
Reduce the size of your images as much as possible using tools like TinyPNG.
Use WebP wherever possible, it's much lighter than JPG or PNG.
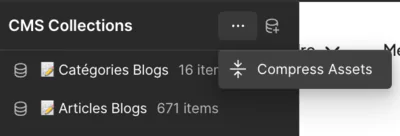
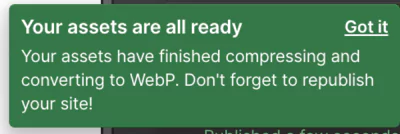
Webflow now offers an automatic WebP conversion tool, remember to activate it.
Once done, Webflow will tell you to republish your website so that everything is taken into account: an incredible asset !
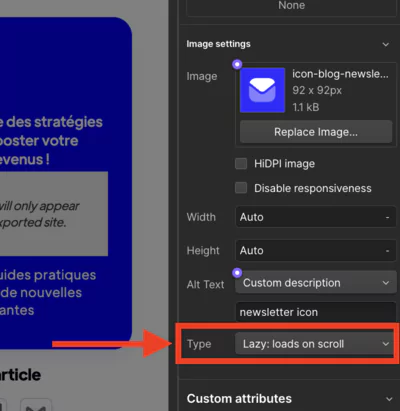
3.2 Activate lazy loading
Verify that all of your images below the fold (not visible) use the Lazy loading.
But for images that are visible on first load (“above the fold”), deactivate it as it would slow down the initial display.
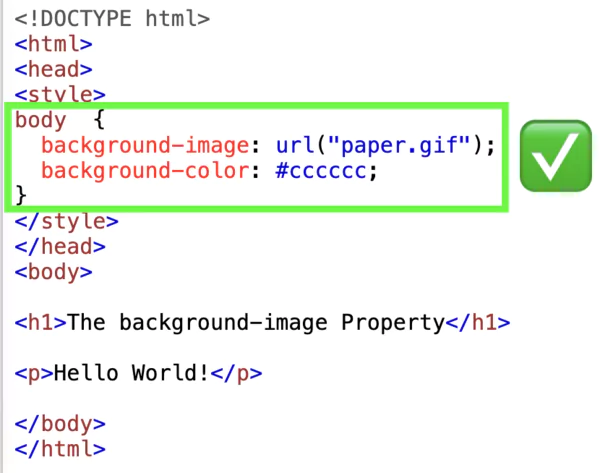
3.3 Avoid background images
Background images cannot be “lazy loaded” by Webflow. Even in SVG, they don't perform very well.
Choose a good old beacon <img> positioned in CSS.
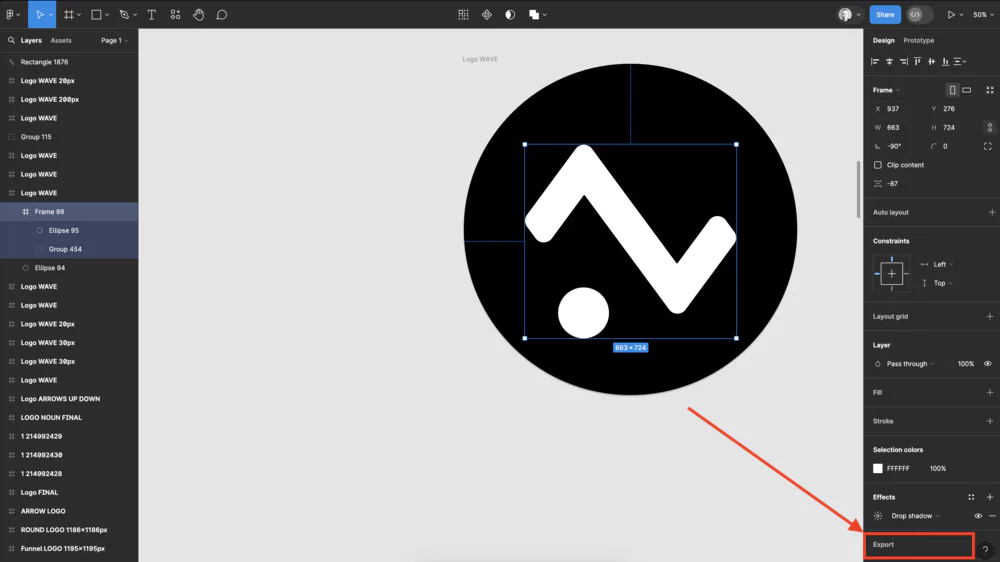
3.4 Use SVGs if possible
Icons, illustrations, and simple shapes benefit from being in SVG format. You can even animate them easily.
But be careful, SVGs are not always lighter than WebP, it depends on the level of detail: check case by case.
My technique? Use Figma to create SVGs whose size I will be able to reduce to the maximum and compress them later with Vecta.
3.5 Integrate small SVGs directly into code
For your small SVGs, integrate their code directly into your page to make them win a request.
But don't do it for big SVGs (very complex vector illustrations), they would increase the initial weight of your page.
4. Optimize Your Videos
Webflow is not the most efficient with the videos. Its automatic transcoding can degrade the quality without the possibility of deactivating it.
Many users also complain that the video “optimized” by Webflow turns out heavier than the original !
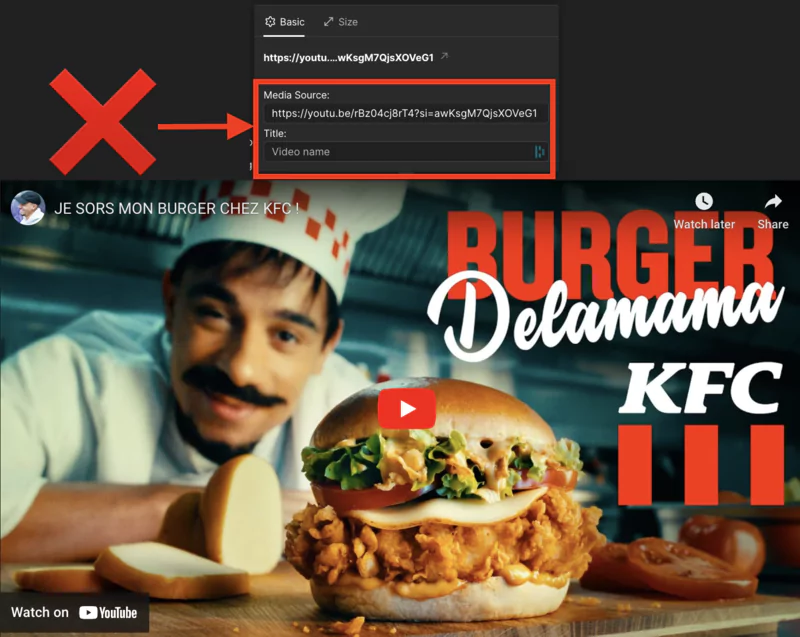
So avoid native Webflow videos and prefer Youtube script or a tag. <iframe> Vimeo that you can control loading just like a script.
For Youtube, click on Share then copy the proposed code by clicking on”Copy“
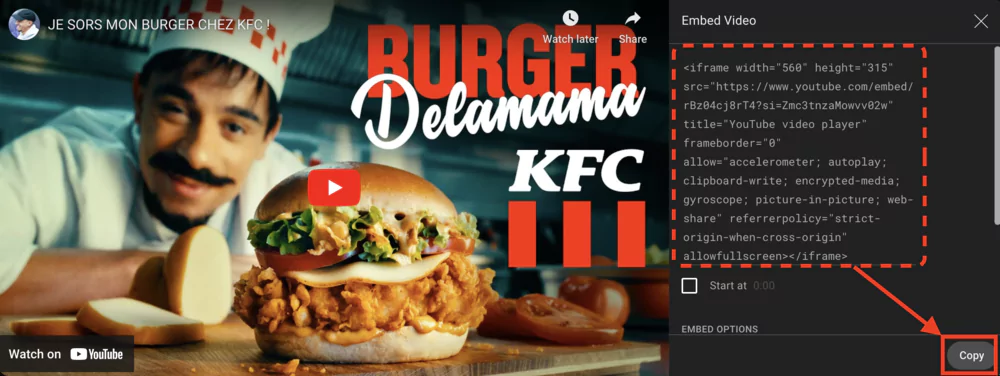
Don't you want to worry about optimizing this code? Ask ChatGPT to do it for you. Here is the result:
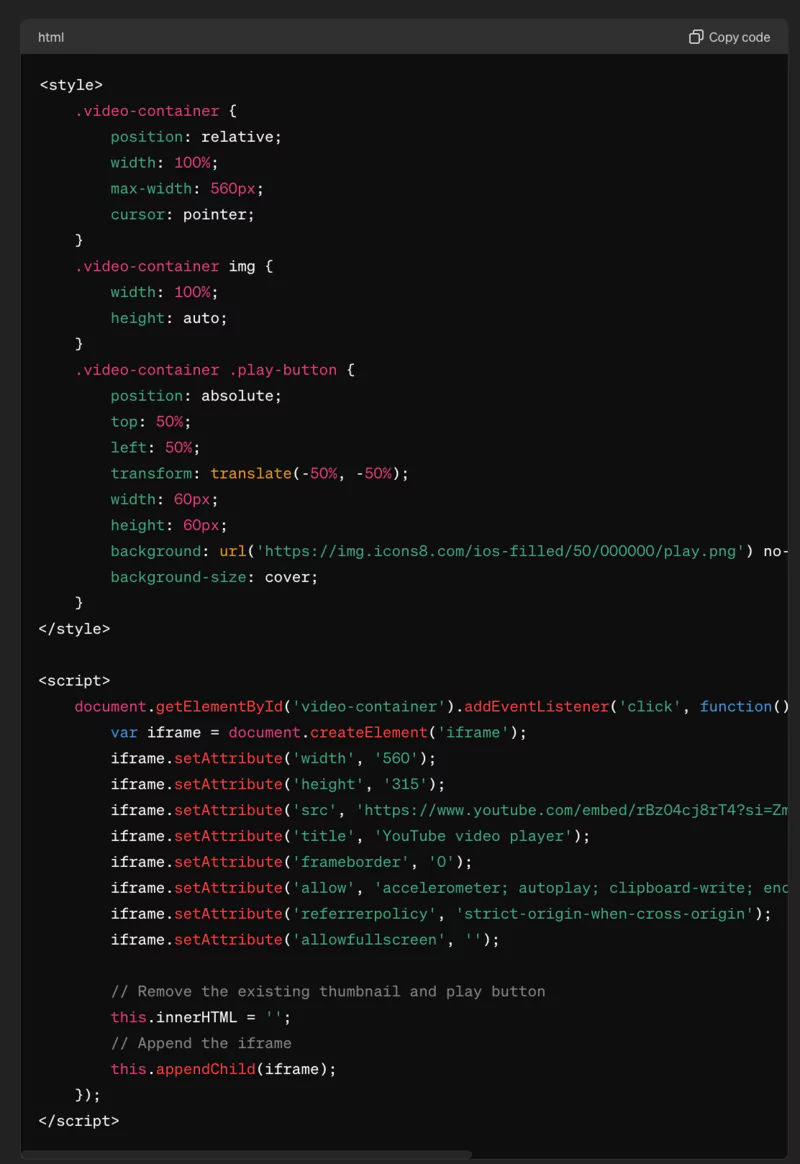
All you had to do was copy it and integrate it into your website.
5. Structure your Site intelligently
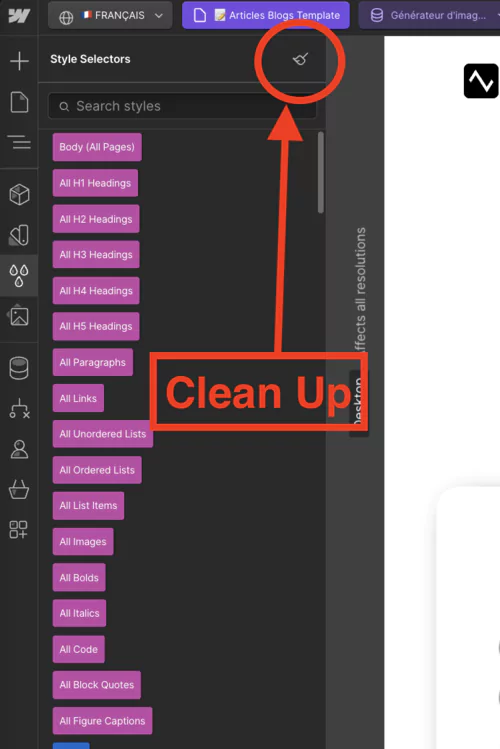
5.1 Do the cleaning regularly
In your Style panel, remember to regularly click “Clean Up” to remove unused CSS classes that continue to be loaded.
Also remove hidden items on your useless pages and draft pages that no longer serve you.
5.2 Mutualize as many styles as possible
Define common properties (fonts, sizes, colors...) on the parent elements like <body> to avoid repeating them hundreds of times in your CSS.
Follow a strict naming convention (BEM, OOCSS...) to keep a clean and maintainable structure.
5.3 Disable unnecessary features
Webflow's Ecommerce, Logic, or Members options add a lot of code. Activate them only if you really need them.
⚠️ ATTENTION, once activated, it is impossible to go back. So think twice! (I made the mistake myself and had to restart from a blank database to re-import my content...)
6. General advice
6.1 Optimize your first section
The first section (“Hero”) should be as light as possible because it is loaded all at once.

Avoid heavy images, big javascript animations, and Lottie effects. Leave that for the rest of the page if you want.
Know that 57% of Internet users don't wait more than 3 seconds before abandoning a page.
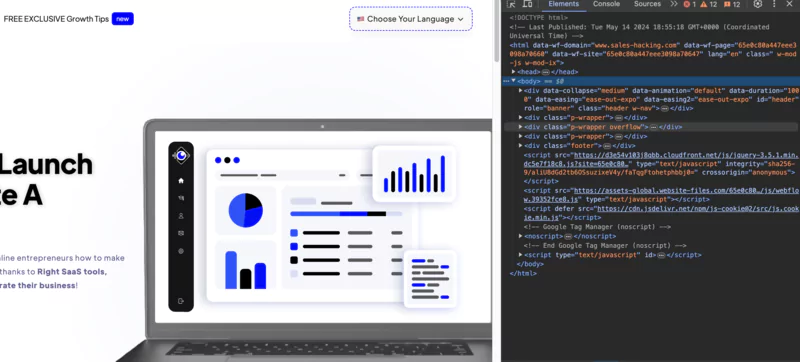
6.2 Learn to use developer tools
Les Chrome Dev Tools (right click on Page > Inspector) are very powerful for analyzing the performance of your site. You will see in detail the requests, their timing, the blocking points...
It's a must to understand what's going on under the hood and identify areas for improvement.
6.3 Aim for the “green” zone in Lighthouse
Webflow has a excellent infrastructure to improve the speed of your website.
Because of its structure, it is difficult for Webflow to reach a green performance score on Lighthouse, except for a mini-site.
It optimizes the CSS and JS code by itself independently.
Your pages will not make additional requests and won't load superfluous code. A good help to get started on a good basis for Place your website in the best places.
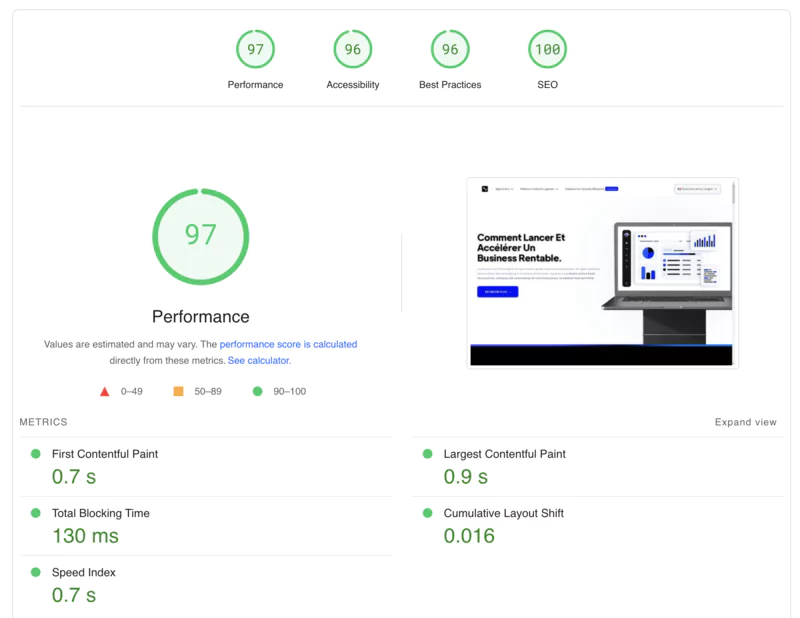
Lighthouse results vary depending on a variety of factors (hardware, network, extensions...).
To have a reliable evaluation of your optimization, Run the test 5 to 10 times and take an average.
FAQs
What is the impact of a slow site on my business?
A slow site scares away your visitors and hampers your conversion. Every second counts! Amazon estimates that every 100ms of delay would cause them to lose 1% of sales.
How do I measure the speed of my Webflow site?
The Lighthouse tool integrated into Chrome devtools is ideal for auditing the performance of your site. It will give you an overall score and recommendations for improvement.
Do you absolutely have to have a score of 100 on Lighthouse?
No, Webflow's constraints make it difficult to get a maximum score, especially on a large site. Aim for a good orange score already, in the 80-90 range. This is an excellent level for the majority of sites.
Conclusion
Optimizing loading speed is a powerful lever for Boost your conversion rate.
Reduce your load time, and you will see directly theimpact on your bounce and transformation rates !
To get there easily, adopt Webflow. This intuitive tool allows you to design fast and efficient sites in a few clicks.
Audit your site, Correct the situation and take advantage of this conversion boost well deserved.
So your prospects will no longer have any reason to leave: The key to boost your conversions !

%2520(1).webp)
